How To Launch Your Streaming Career 101: Getting Your Stream On
We hope we’ve encouraged you to give video game streaming a bit more thought in our previous two articles in this series, and this last article can serve only one purpose: show you the basics of streaming so you can dive right in as soon as you’ve read it (well, not really, but kind of).
But first, if, by some reason you’re reading this article but don’t know what am I talking about, chances are that you’ve missed the first two articles in the series, and I strongly encourage you to give them a look before continuing – I promise it’s worth it.
But back to the topic at hand. We’ve explained that the streaming business is booming more and more each day, with Twitch slowly becoming one of the biggest websites on the Internet, with over 10 million people watching streams daily. Streaming games is an interesting thing to do if you love gaming and have a pleasant personality. But what happens once you decide that you want to start streaming? Maybe at first just as a hobby?
You’ll need a few things, and we’re here to tell you all about them.
First Up: The Computer, Of Course.
The first and foremost thing you’ll need to do to start your future streaming career is, of course, a computer. This is really a no-brainer, but a lot of people aren’t as well-versed in hardware as it might seem. Let’s get through with the basics, then, okay?
I can’t really talk about the basic requirements when it comes to PC specs for streamers, as they are hugely dependent on the things you are streaming. For example: if you want to spend your days streaming CS: GO or League of Legends, you don’t need a computer that’s eye-wateringly hardcore. [su_box title=”Streaming is extremely popular, and games like League of Legends attract millions of players – it’s not hard to start streaming, though.” class=”trap small left”][/su_box]
Twitch advises having at least an Intel Core i5-4670 processor (or its AMD equivalent), 8GB of RAM and the newest possible operating system. Of course, you’ll need a graphics card that can push those details to the screen and have at least DirectX 10 compatibility. I would suggest nVidia’s newest range of cards if you’re buying new, but you won’t be sad with AMD, either.
Bear in mind, however, that streaming and gaming at the same time can be quite a task for your PC. It’s because the computer needs to grab the screen of what you’re doing and upload it at the same time, which takes a bit of horsepower. A lot of streamers simply use two computers because of this: one for playing and another one for streaming. Using a laptop and a PC can work just as well.
Step Two: The Internet Connection
You see, many of us don’t really think about bandwidth quite a lot, right? Internet connection upload rates aren’t exactly keeping me up at night, but they are extremely important when it comes to streaming content.
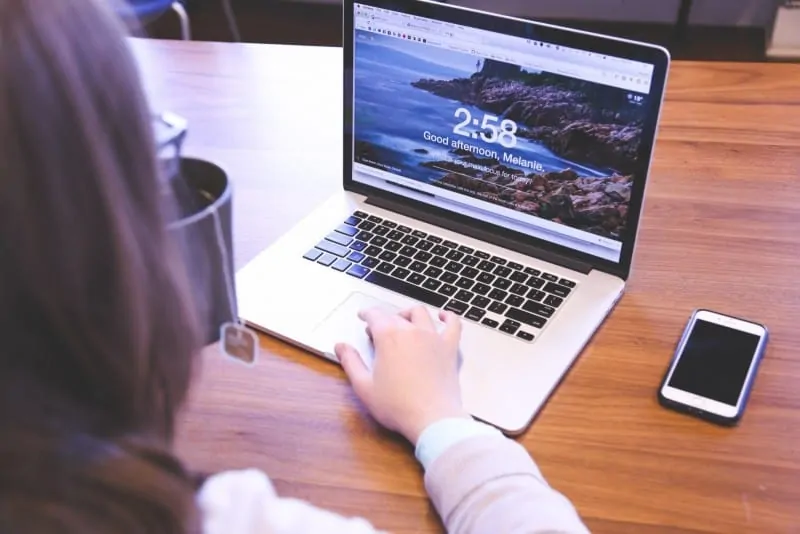
First, you’ll need to know your internet speeds, of course. Those are easily obtained by performing a speed test on the Ookla site and are measured in Mbps (megabits per second). Your task here is to check out the results of the test and make sure that you have at least 3mbps of upload speed (the smaller one), which will allow you relative ease when streaming. Of course, bigger is better and all speeds in excess of 3mbps can only allow you to make higher quality streams that are more stable. [su_box title=”A steady Internet connection is also imperative for uploading content to your dedicated website. The faster the connection – the better!” class=”trap small right”][/su_box]
If your connection is struggling to cross this line, I have bad news for you. You’ll need to invest a bit more money to get a faster connection, or you’re risking a slow stream. Of course, that’s not always the case, but you shouldn’t risk by streaming on a very weak connection, especially if you have others living in your household. Uploading a lot of content drains the connection significantly, so there’s a chance that others won’t be able to use the internet at all.
Step Three: Audio Recording Kit
The thing most of us connect instantly with streaming is the image of a person sitting behind a microphone and playing games, and that’s about right for the most part. To start your streaming career, you’ll need some kit to make yourself heard (or seen) to the people you’re streaming to.
This is where your budget comes into play because you can easily start a stream with the basic headset + webcam combination, but that’s not what we’re talking about here.
While I don’t have anything against headsets, I think that it’s better not to have something on your head during long gaming sessions, especially in the summer. That’s why I’d recommend getting yourself a boom arm and a microphone, just like the pros. Aside from looking extremely cool, it’s really much more pleasant for you and sounds oh so much better. [su_box title=”A good audio setup will literally make your voice heard better, and your viewers will appreciate it a lot. Speak up! ” class=”trap small left”][/su_box]
Even a cheap dedicated microphone will sound better than an average headset one, that’s for sure. Apart from the microphone, my advice would be to get yourself an audio interface, such as the Focusrite Scarlett, that will provide you with both the input for your shiny new microphone and the power to make it sound sweet.
You can get both in a nice combo pack from Focusrite, and I cannot recommend this setup enough – I am using it at the moment. Other than this, you’ll just need a boom arm with a pop filter and shock mount that you’ll get off of eBay and you’re all set to talk to your heart’s content.

Step Four: The Software
The first app you’ll need isn’t an app but an account. Of course, we’re talking about Twitch, as you can’t really stream to Twitch without an account. Once you got that covered, you need a bit of kit to make you ready for the world.
This is where the things get really interesting. You see, you can’t simply plug Twitch on and hit “record” because you need some sort of recording program to process your footage and send it on its way. For nVidia graphics card users, there’s a feature incorporated into your graphics card’s software called Shadowplay that lets you seamlessly stream from any game with the click of a button, and I can really confirm that it works pretty great. [su_box title=”You can also save your streams, and upload them to your website later!” class=”trap small right”][/su_box]
It’s a feature nVidia has developed especially for streamers and gameplay recorders, so you know it’s the right thing for your Twitch career. If you don’t want to use it or have a Radeon card, you’ll probably be using OBS, the world’s most loved streaming software. Getting started with streaming through OBS is extremely simple, and even Twitch shows you how to do it on their own website. I advise you to consult the guide, as it’s pretty lengthy and covers a lot of ground.
Step Five: A Personalized Website
Of course, now that you have your very own streaming setup, as well as a Twitch account and your screen-grabbing software set up, you only need to start clicking away and streaming.
But wait up for a second.
There’s still a step you should take, and that’s setting up your identity online. This includes everything from your branding and logos to your website – all of that needs to work before you start streaming big. Of course, you don’t need something extravagant right away, but with a small hosting plan and a shiny new website, you’re set to provide your followers with all of your content in one place. [su_box title=”Your new website can serve a lot of purposes, and make sure you register a .ME domain for it, too!” class=”trap small left”][/su_box]
We suggest giving one of our guides a look if you’re feeling in need of aid, as we’ve written about websites a lot of times before.
The website should serve as an aggregate of sorts, for all of your social media accounts, streams, and perhaps even merchandise once you make it. It’s a great way to showcase what you’re doing and do it in a way that most people will remember. The biggest streamers are using websites for all sorts of purposes, and you shouldn’t shy away from them just because you’re starting out – it can help you a lot.
You can look into all sorts of WordPress themes to install on your hosting plan, and a lot of them can also host videos if you so desire. Just make sure that you have an idea about how your website should look like before you proceed to the purchase of a theme. Some of them are more like content aggregators, while others put your video content on display – it’s up to you to choose what’s the direction you’re heading in.
After the website, it’s time to polish your other social media, and make it all a part of a great personal brand for you, so that you can start gathering those followers and viewers and set foot on the road to Twitch success!
Of course, your website needs a domain, and what better domain to choose from than .ME, the web’s most personal domain name!
Don’t Forget The Little Things
Once you’ve set up your OBS or another app of choice I can tell you only one thing: congratulations, you’re all set to stream! There are a few other things that you need to know, though:
Set up a schedule of streams
Make sure your audience is aware of it through your channel information panel and your social media profiles. Make sure you announce your streams accordingly, to get the most viewers possible. This is pretty easy to do, as you can make graphics that outline your schedule with simple design software such as Canva or Inkscape. Your schedule needs to be concise, straightforward and informative – remember that!
Pick your games and niche.
If you’re the happiest by playing indie titles, you do that. Don’t stream DOTA or LOL just because everybody’s doing it – be yourself and the people will know it. It’s easy to just jump on the bandwagon, but you can burn out pretty easily if you don’t like what you’re doing. For instance, PlayerUnknown’s Battlegrounds is insanely popular today, but that doesn’t mean that you should stream it if you hate it – find other stuff you like and you’ll have more fun. Remember: more fun means better streams!
Interact with your viewers.
Tell them you’re new to this and ask for constructive criticism, as well as their opinion on what you’re doing. Beware, though: Twitch chat can be a pretty vulgar place, and new streamers can get overwhelmed easily. There’s a plus side, though: you can get donations from viewers!
This also means that you should interact with other streamers, too. There are certainly others who have made it near you, and you should try to get to know them, as well as make friends inside of the community – perhaps host a joint stream or two?
Don’t fret if you don’t succeed at first
Give it time and test out a few things before giving up. Twitch is sometimes ruthless, but it can be the best place in the world once you get the hang of what you’re doing. It’s not easy by any means, but dedication and hard work can sure pay off – just make sure that streaming is something you really enjoy doing and everything else will surely fall into place slowly.
And that’s about it: you should be ready to start streaming once you have the few basic hardware requirements, and you can upgrade your setup as you see fit later. We’re proud of your for sticking to the end, and wish you the very best in making it as a streamer – just remember us when you’re on top!
[conversion-boxes title=”Want more articles like this one? ” text=”Well you’ve come to the right place. Subscribe to .ME today and get the latest content straight to your inbox.” secret=”” button=”Subscribe”]